
Lathe Turned Alabaster
Vessels - Part III
See also
Turning Alabaster on a Wood Lathe
- an outline of FAQs - it covers alabaster turning in a more general
way. This section is specifically how I work, omitting some general discussion
and many useful techniques that I am not currently using.
Contents:
Interior Final Shaping
Sanding and Finishing
Removal from the Lathe
Vacuum Chucking
Finishing the Base
Photography
 fig. 15-1 |
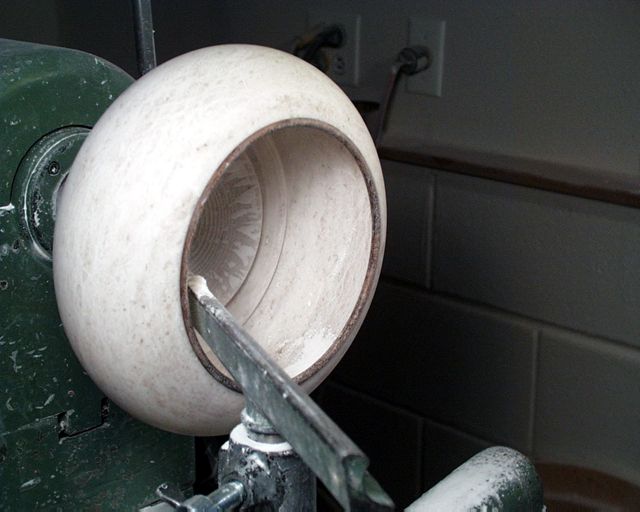 fig. 15-2 |
||
 fig. 15-3 |
 fig. 15-4 |
 fig. 15-5 |
 fig. 15-6 |
 fig. 15-7 |
 fig. 15-8 |
 fig. 15-9 |
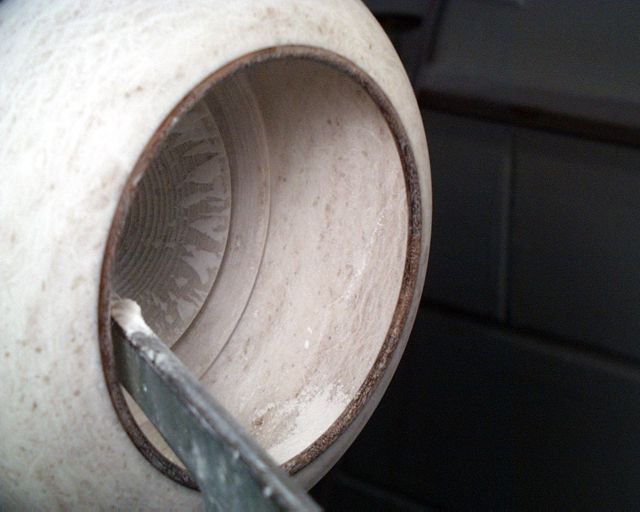 fig. 15-10 |
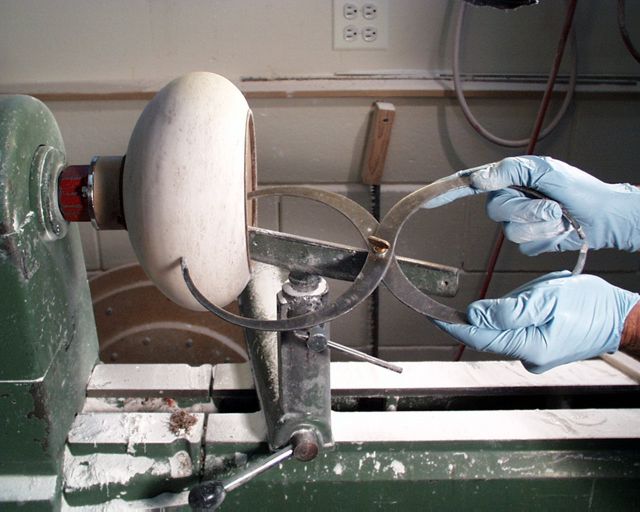 fig. 15-11 |
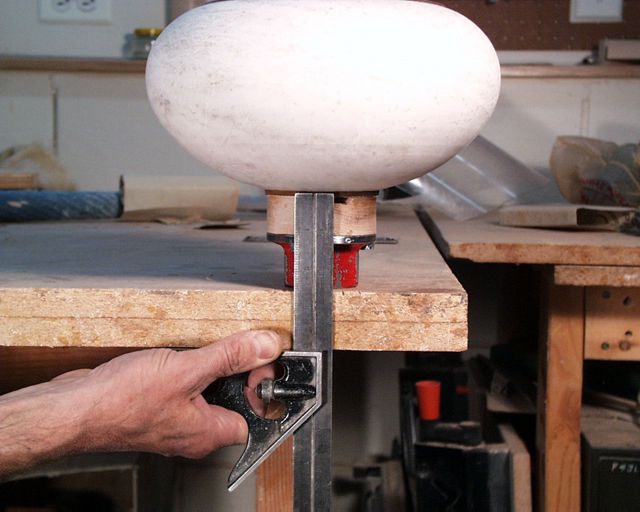 fig. 15-12 |
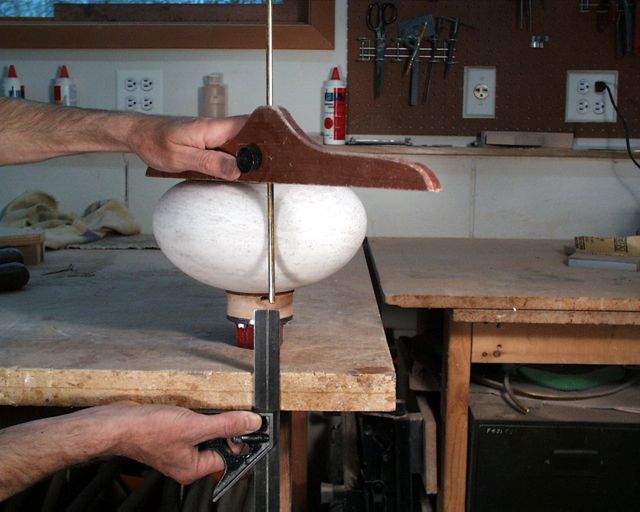 fig. 15-13 |
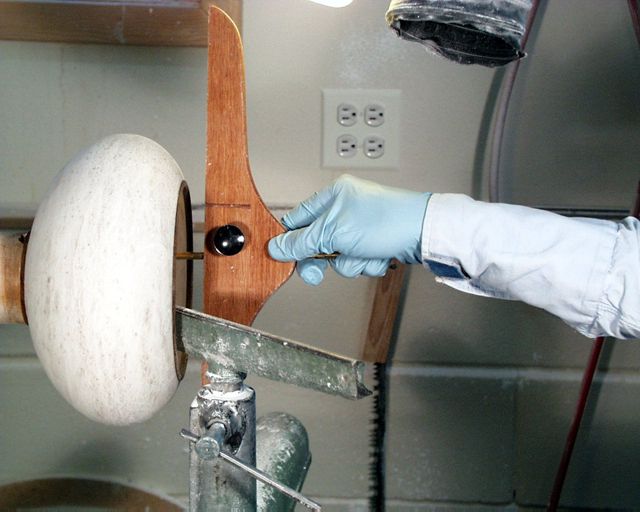 fig. 15-14 |
Once I have the rim shaped (fig. 15-1) I move on to the thickness of the walls. How thick should they be? Mine are usually 1/8" - 3/16". What I want to convey is a balance between the fragility of a piece and its strength. If someone feels a piece is too thin to pick up without breaking, that's too thin. I want people to feel comfortable holding these bowls.
I start this process at the rim of the piece and work inward. Working in steps (figs. 15-2 - 15-10), I first remove the excess from about 1" of the wall until it is about 1/4" thick, then take the first 1/4" of the that 1" down to final thickness, then the next 1/4" down to final thickness, then the next, then stake out another 1" or so of wall, then get the last 1/4" of the first 1", then the first 1/4" of the second 1", continuing until I get close to the bottom of the piece. I check the wall thickness frequently with a figure eight caliper (fig. 15-11). As you near the bottom of the piece the figure eight caliper won't work, figures 15-12 through 15-14 show my technique for checking the thickness at the bottom. With the piece on the bench, I use a T-square to notice the distance from the bottom of the bench to the bottom of the stone (fig. 15-12), then come down from the rim of the piece to the top of the T-square with a depth gauge (fig. 15-13). When I put the probe of the depth gauge on the inside center of the piece, the distance from the gauge cross bar to the rim is the thickness of the stone at the bottom (fig. 15-14). I leave a bit more stone (1/16" extra) on the base than in the wall. This allows me to have a smooth curve on the inside of the piece while giving the appearance of a consistent wall thickness for the whole piece.

Alabaster sands beautifully (fig. 16-1), the paper doesn't dull or clog up as quickly as with wood. I do all my sanding dry, it is easier to clean up dust than mud. The dust collector pulls almost all of the fine dust up immediately, the rest falls to the floor fairly soon. I start with 80 grit and work up to 600 grit.
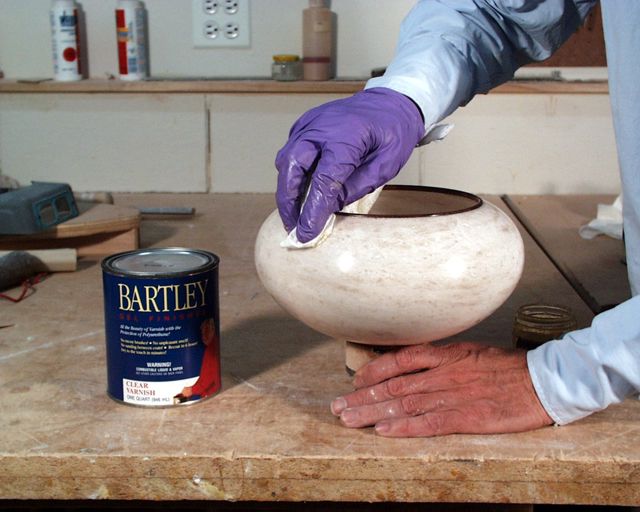
My current favorite finish is Bartley's gel varnish. Notice the piece is still on the faceplate (fig. 16-2), if I see something I don't like (poor sanding for instance) I can go right back to the lathe for corrections, the base will get finished later. The first step in finishing is to wipe the piece down with mineral spirits. This serves two purposes, one is to clean any alabaster dust out of the pores in the wood. Secondly, the mineral spirits soak into the stone somewhat. The first coat of gel varnish is applied before the mineral spirits have evaporated so that the first coat is also absorbed into the stone. Gel varnish is very easy to use, just wipe it on and wipe it off, a thin coat is left on the work and will dry hard in several hours. Be sure to wipe it off well, if you leave a blop of varnish or streaks from the wiping on the work it is awkward to remove later. I do about 4 coats. Stop when another coat doesn't improve the surface. The varnish will probably yellow some with age, so I don't think it is good idea to load up the surface with extra coats.
From this point on be extra careful, you have a lot of time in the piece, it looks quite nice, it's getting harder and harder to hold on to, and you can't drop it.

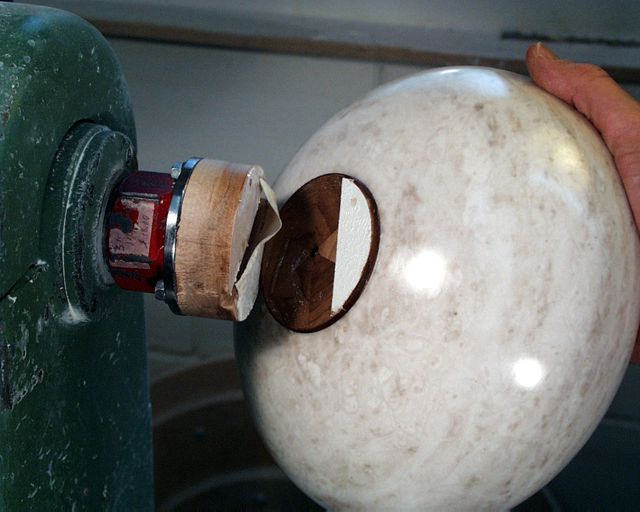
The scrapwood block that the faceplate is screwed into (and the base is attached to with double faced tape) has a slot in it (fig. 17-1). This gives me a place to start separating the tape joint. I put a small screwdriver in the slot and use an even, gentle prying. The tape will start to give, as it does I slide a dusty knife into the joint, keep prying and working the knife into the gap. The piece will not release all at once, at some point I just pull it off the rest of the way (fig. 17-2).

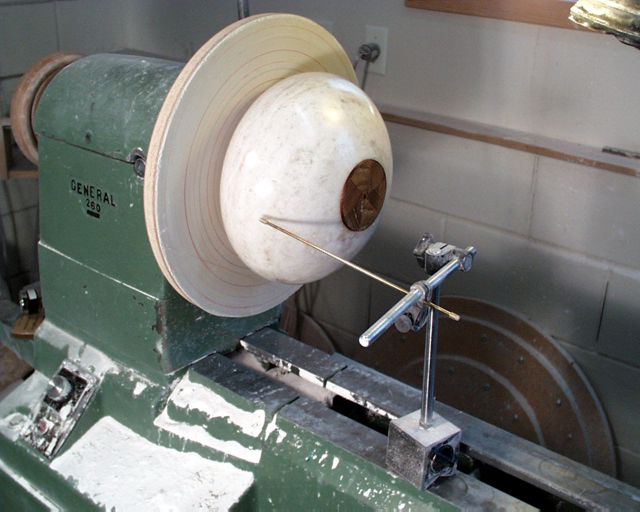
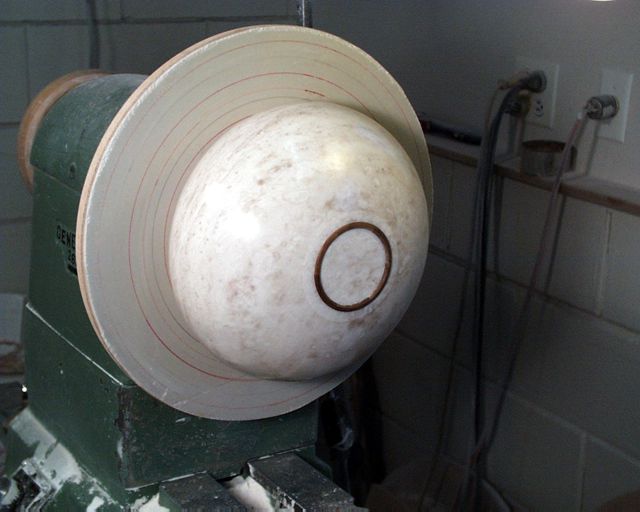
A vacuum faceplate (fig. 18-1) is used to hold the piece for the finishing of the base. There are circles drawn on the faceplate for the initial centering, then a probe with a magnetic base is placed on the bed of the lathe (fig. 18-2). Rotating the work by hand reveals the corrections needed for true centering. With one hand on the work I release the vacuum, slide the work over some and repeat the process until it isn't getting any better, it's usually less than 1/100th out of center. You are the judge of how much patience you have versus how much out of center you can tolerate.
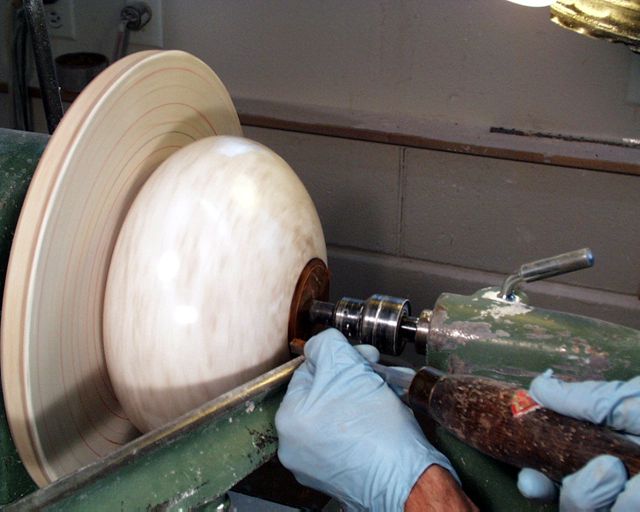
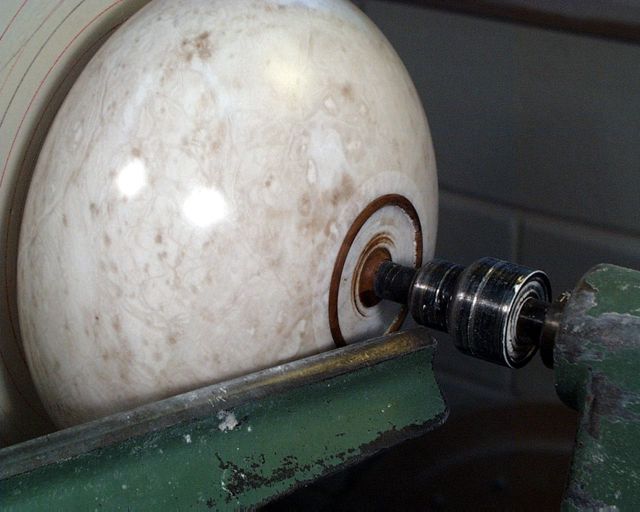
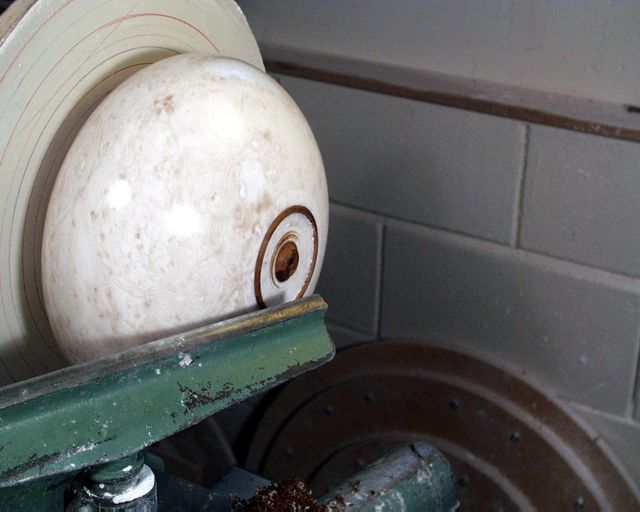
I bring the tailstock up just to the point of contact for a bit of extra support, then start removing the waste material from the base as well as shaping the base (fig. 19-1 and 19-2). At some point the tailstock must be withdrawn to remove the last bit of waste (fig. 19-3). I then sand the base and the adjacent stone just as I did the whole piece before it was removed from the faceplate (fig. 19-4). The finishing procedure is also the same. Voila, it's finished - well not quite.

I photograph everything I make. Over the years this has proved to be an invaluable reference. My work is all similar enough that it is very easy for me to set up my "photo studio". Figure 20-1 shows the basic set up, further discussion of photography is beyond the scope of this article.
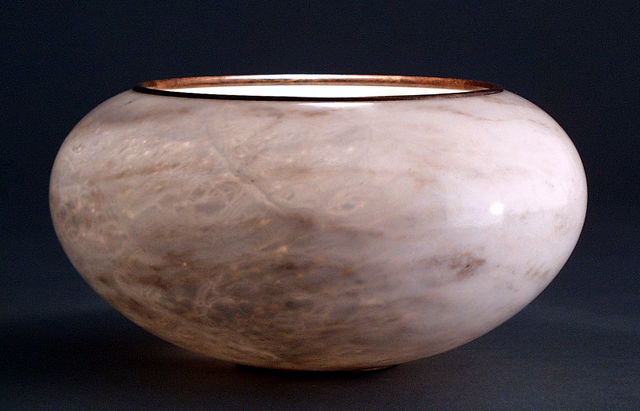
Now it's finished.
Do you have questions, comments, or different ways of doing things? I'd like to hear from you.
Lathe Turned Alabaster Vessels part II
Lathe Turned Alabaster Vessels Addenda
Help
support this site |
Home * Send
E-Mail * Site Map * Wood
Turning * Alabaster
Turning * Guitars * Shona
Music * Marimbas * Bio
© 2000 Max Krimmel non-commericial
duplication and distribution expected and encouraged
Max Krimmel - 4875 Sioux Dr. apt. 008 - Boulder, CO 80303 - 303-715-8275