
|
The Great Fan Bass
|
 |
In the Beginning
The idea for this bass originally came to me at Zimfest '99 while looking at the beautiful balafons made by Marimba One. These instruments, which have roots in traditional balafons, look like a warped marimba, the ends lift up, the center is depressed. The balafons were great fun to play, the mallets seemed to bounce back over the bars and with just a bit of vector correction land on another note - cool. I'd been thinking about a bass for Chimanimani. Why not a bass balafon? Ugh! what a mechanical nightmare, well maybe just a bit of bend to it, or maybe bend it in the horizontal plane rather the vertical plane. Hmm, that would waste a lot of space, .... unless I were to make the bars wedge shaped, .... would wedged shaped bars even work? .... the frame would then be a big curve, ....And that would be a lot of trouble to make. So the idea just sat there, I made some drawings, but kept getting stuck on an easy way to make the frame. There are lots of ways to bend wood, all of them seemed like too much trouble. Then I thought of an easy way to make a form and my fate was sealed. I had a two week window in Oct. '99, I thought that would be enough time. OK, I would build that bass. If it worked - great, we'd have a bass. If it didn't work I'd have some interesting and expensive firewood. Now, months after that two week window, I'm still tweaking the bass, other projects are getting embarrassingly late or have been scrapped entirely. Are there no twelve step programs for bass building addicts?
So, in order to either spare others the trouble, or perhaps create more members for the BBA (Bass Builders Anonymous), I offer the following information.
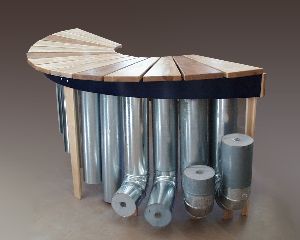
There were two major design considerations. First, I wanted to build a more ergonomic bass. Bass marimba players seem to spend a lot of effort just getting from one note to the next. For a smaller person the stretch over the standard 10 note range required an awkward full extension of both arms. So the fan shape seemed appropriate. Rather than reaching and shifting one's feet, the outer notes could be accessed with a more efficient trunk rotation. Second, I wanted a portable bass, what use is bass marimba if you can't take it anywhere? So it breaks down thoroughly and packs well. The bars rest on the frame on 1/2 weather strip and are kept in place with three pins, two in the wide end, one in the narrow end. The pins are 3/16" brass covered with vinyl tubing. This allows the bars to be easily lifted off the frame one at a time. The resonators are made of galvanized air ducting, 10" for the low F and G, 9" for the low A and B, 8" for the low C, D and E, 7" for the F', G' and A', 6" for the high B', C', D' and E'. Each resonator drops into its hole in the frame and is held in place by a stop collar made of PVC. The resonators nest together, so in storage there are three nests, (F, A, C, F', D' and E') (G, B, D, G' and C') and (E, A', and B'). The frame breaks into two sections and can be set up as a ten note short bass with the usual range of C to E'. It all fits into a Honda Civic (if you take the passenger seat out) and can be set up and moved (a few pieces at a time) by one person.
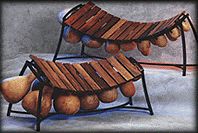 Balafon by Marimba One |
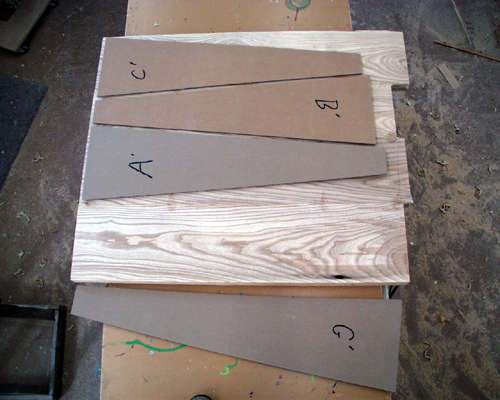
 This was the last drawing I made before going to the cardboard patterns. |
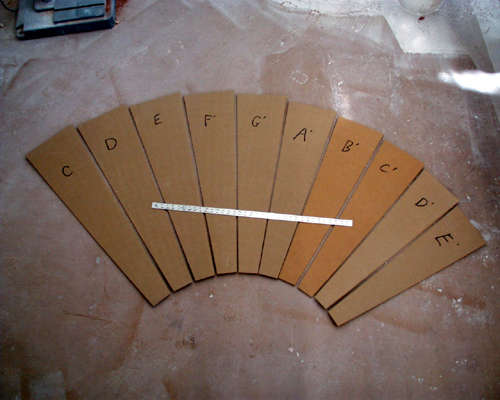 The first layout of cardboard patterns in the standard bass range. |
||
I made a few drawings and then made some full sized cardboard cutouts of the notes. With the standard range of C - E, the instrument seemed very compact. Gee, why not add some notes on the low end? Since the bars spread out I could use 10" tubes pushed toward the wide end for resonators, I'd probably have to close off the openings some to tune them and still keep things a reasonable height. And so, the B, A, G, and F were added. The cardboard cutouts turned out to be very helpful, there were numerous layout decisions that I made simply by spreading out the cardboard bars.
The bars are made of ash. I had played some ash bars at Zimfest '99 and liked the attack envelope. They seemed to have more punch and a quicker falloff than mahogany bars, plus ash is about half the price of mahogany, and if this project were to end up in the fire there were more BTUs per dollar in the ash. I didn't worry about quarter sawn wood.
 |
 |
 |
|
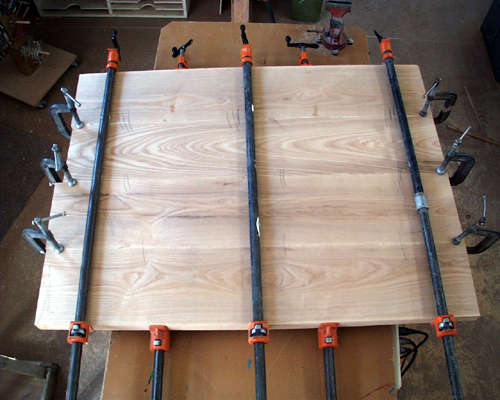
The basic procedure for making the bars - a panel
is glued up, cardboard patterns laid out, and the panel then cut up
into individual bars.
|
||
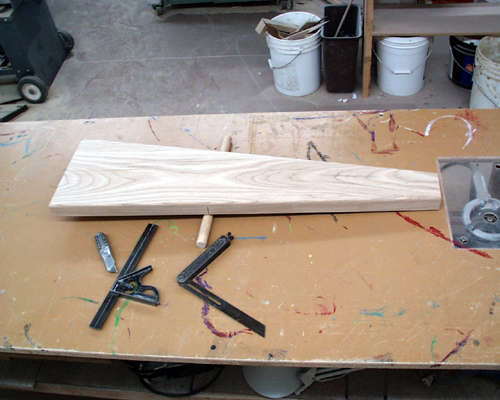 Finding the balance point to determine the "center" of the bar. |
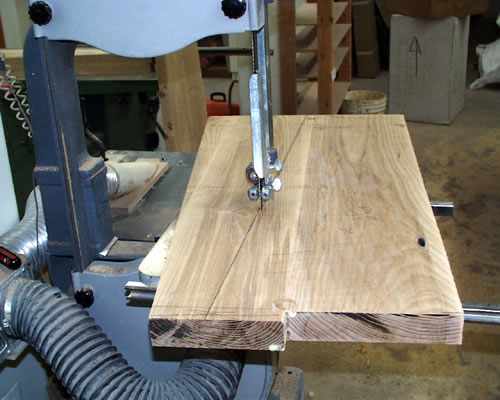
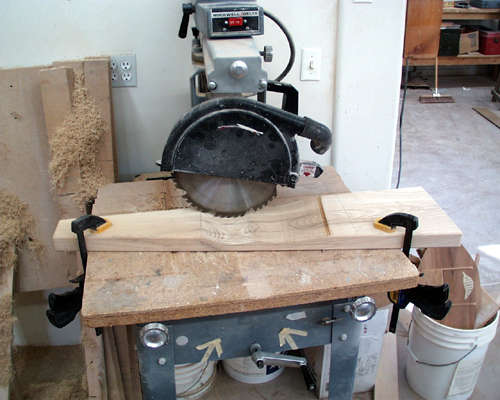 Rough tuning on a radial arm saw. |
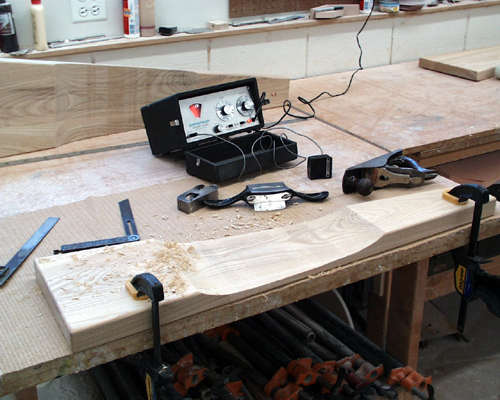 The fine tuning was done with planes, scrapers, sanders - anything that worked. |
The bars were glued up as panels and then cut to size for efficient wood use. I've worked a lot of wood and built some excellent guitars, I don't believe there is any advantage to a one piece bar. The glue is insignificant acoustically, and if you make a good joint a bar is more likely to crack anywhere but the joint.
After the bars are cut to size the next step is to rough tune them. Since the bars are not symmetric the tuning arch won't be symmetric either. The first step is to find the balance point of the bar and permanently mark it. When things get confused in the tuning process it's nice to have this reference point. My original thought was that this point would also be the thin point of the bar, and consequently the sweet spot under which the resonator is positioned. In the current tweaking process I have discovered that it is possible, and sometimes desirable, to push the sweet (thin) spot toward either end of the bar. If you have tuned some bars you have noticed that the longer narrower bars have a more gentle arch than the bars which are shorter and stubbier. On a wedge shaped bar one end is a long narrow bar and the other a short stubby bar. The tuning arch will reflect this.
My first plan in tuning was to tune the fundamental and deliberately keep the overtones out of tune. On some basses I have heard the overtone is so prominent that it overrides the fundamental, giving the weird sensation of another soprano being played. My idea was that the resonator would reinforce the fundamental and the mistuned overtones would dissipate. Accidentally I managed to get the overtones on one bar in tune, and it was the best note on the instrument. I have since gone through and double (or triple) tuned all the bars that weren't hopeless. The extra tuning is noticeable but not any great improvement. I still have the one "best" note, the high G.
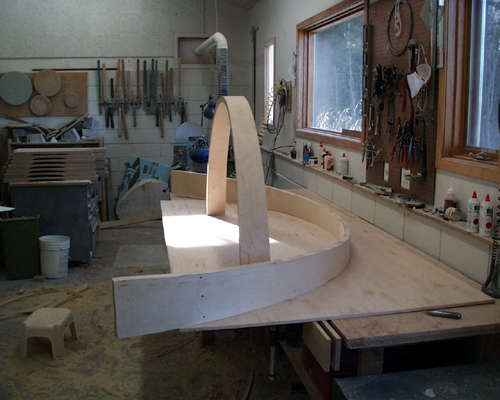
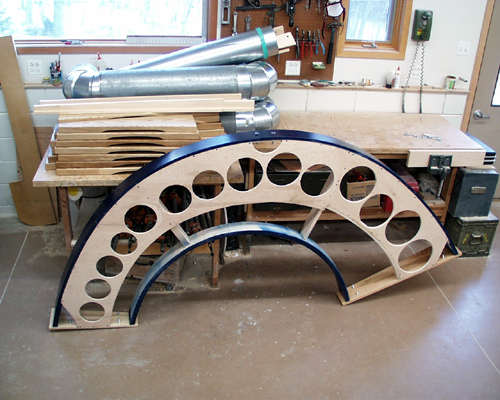
After the bars were rough tuned I found the nodes and marked them on the corrugated patterns as well as the actual bars. By laying out and pushing around the patterns I came up with a pattern for the frame. I transferred this pattern to a sheet of 3/4" particle board and made the bending form. The outside frame rail is made of five layers of 1/4" Baltic birch plywood (it's birch all the way through, sold at Paxton lumber stores in 5' x 5' sheets). The inside rail is three layers. I made the rails extra long so I could push things one way or the other. Also, I anticipated some springback in the rails, and tightened up the radius of the outside form about 6" and the inside radius about 3". Things worked out well enough. With the rails bent I then cut the profile in them so that the bars at the ends of the marimba would have more lift than those in the center, (shades of the balafon creeping in). The end bars have a 4" rake, the center bars a 1" rake. End caps and a couple of braces (one between low B and C and another between middle G and A) completed the frame. After moving this frame around some it became clear it was too large to keep in one piece. The idea of the "short bass" from C to E' became a reality by cutting the frame at the brace between the B and C.
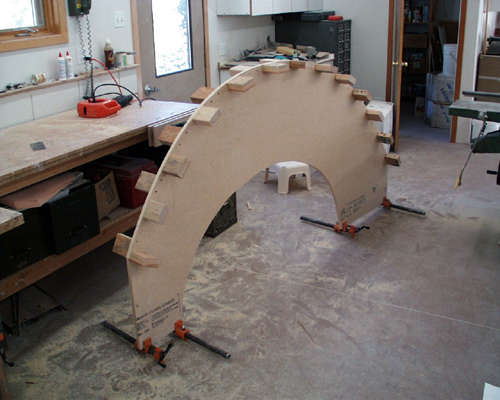 This is the bending form for the outer rail, it's made of particle board and short lengths of 2x4. |
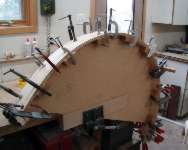 Here's the form for the inner rail with the inner rail bent around it. I start at the end and each clamp bends the rail a little further. |
 Here are the two rails with the profile for the rake of the bars cut in them. |
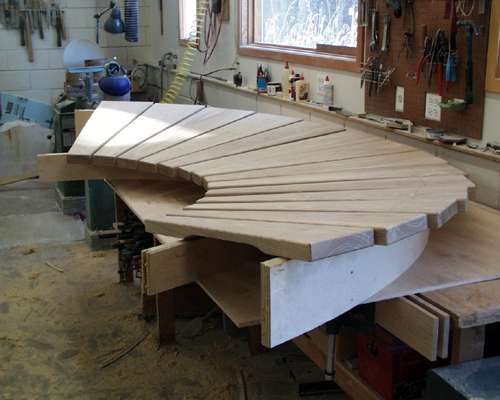 The rails with the notes set on them. |
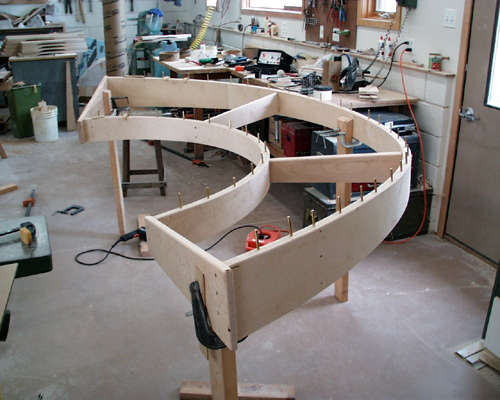 The frame on temporary legs. |
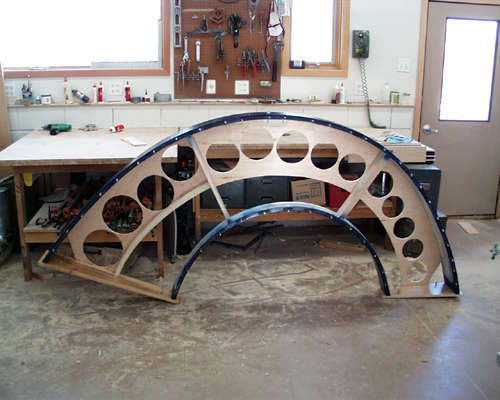 The completed frame, with the resonator bracket in place, before it was cut it into two sections. |
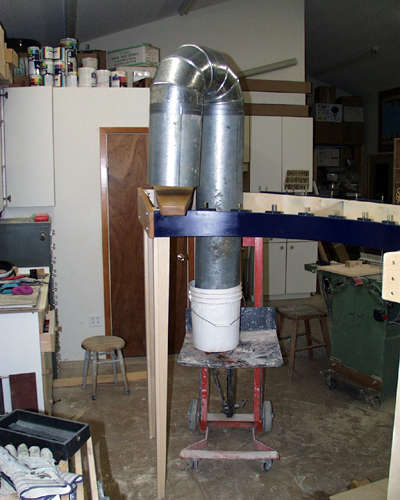
The resonator bracket was cut from 1/2 plywood and glued to the frame. The straight tubes (C - E) drop in from the top, the bent tubes (F - B) come up from the bottom and are supported from below, independently of the frame. I used galvanized air duct for the resonators. PVC and all the necessary fittings for the low tubes would have been quite expensive. Sonotube (cardboard concrete forms) is cheap and light but not especially durable and a real challenge to bend. If you go the galvanized route take some care in sealing the ducting. Clean the metal well and use a polyurethane sealant. Tuning the resonators with a water bucket works well on the straight tubes and I even tried it on the bent tubes as well. But, in the end I used a slider to tune the low tubes.
Like many of the traditional marimbas from Latin America and Africa this bass is built to buzz. An opening was made in the bottom of each tube, 1" diameter for the upper notes, 1 3/4" diameter on the lowest note with in-between sizes for the middle resonators. I tried many different materials for the buzzer, it's a matter of taste, the plastic grocery bag was my favorite. On the low notes you can create a broad range of sounds by changing the material and adjusting the tension of the buzzer.
 Tuning the low F with a bucket of water. The tube is set upside-down in the hole for the G. This was more trouble than making a sliding endcap. |
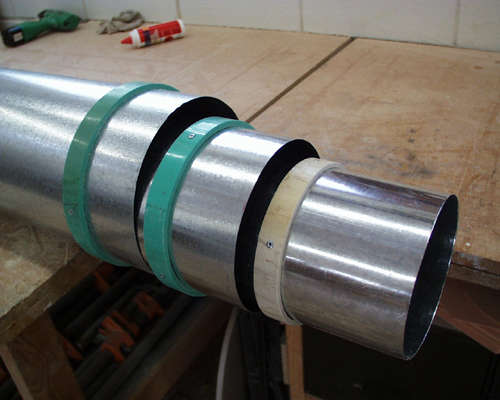 A nest of the smaller resonators, 8", 7", and 6". The stop collars are PVC, pop riveted in place. |
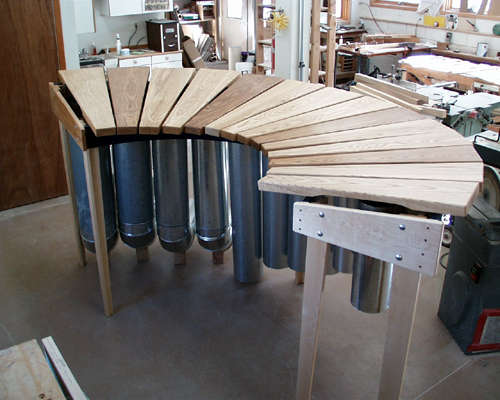 Finally, everything set up. |
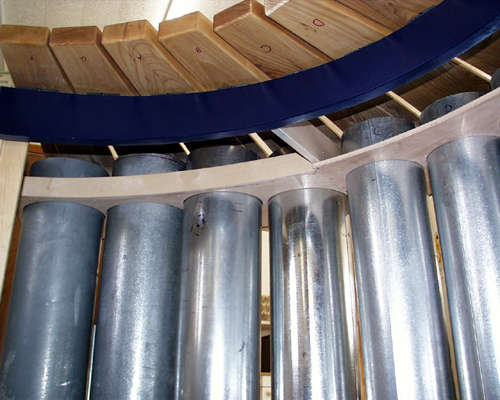 Looking up from underneath on the bass end. |
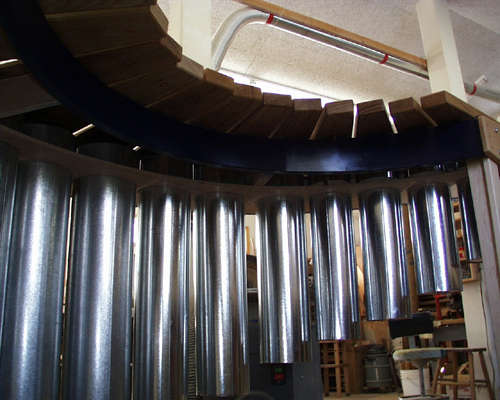 Looking up from underneath on the treble end. |
 Here it is disassembled and packed up, before I cut the frame. |
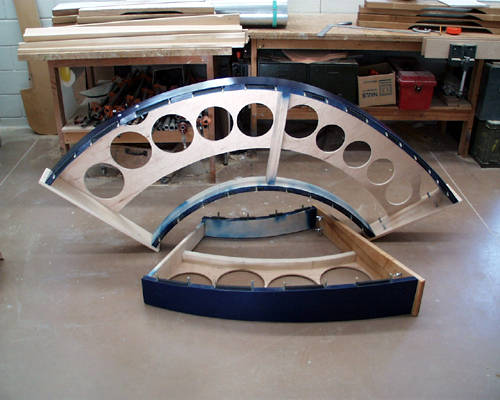 The frame cut into two sections. |
 The "short bass" broken down. |
So, for all that trouble was it worth it? Well, it does what I set out to have it do. Ergonomically it is a joy to play. Acoustically it has more attack and less sustain than the mahogany basses I've played. It is also completely portable. But, if all you are after is the sound - do it electronically. If what you want is a bass marimba - build it the usual way. But, if you are interested in a project, something that will tell the world you are close to, if not over, the edge, well - welcome to BBA.
Don't miss the addenda, added Feb.2002.
If you have questions, comments, or other stories of bass marimba building - contact me - For more general information about marimbas go to Greg Latta's marimba links.
"Looks like something out of Willy Wonka's Chocolate Factory" A. M. - Boulder, CO
"You could call the mother ship on this one" T.D. - Boulder, CO
Help
support this site |
Home * Send
E-Mail * Site Map * Wood
Turning * Alabaster
Turning * Guitars * Shona
Music * Marimbas * Bio
© 2000 Max Krimmel non-commericial
duplication and distribution expected and encouraged
Max Krimmel - 4875 Sioux Dr. apt. 008 - Boulder, CO 80303 - 303-715-8275