
The Square Plan for Polychromatic "Random" Wood
Bowls
see also the
Hex Plan
 |
 |
 |
| From This | To This |
This is a system for making your wood go further. If you have gone to all the trouble to make a glued up block, it's a shame to see any of it reduced to shavings. In this procedure a block 12" x 12" x 3" is cut up and reassembled into a block 18" x 18" x 2 1/4" which is thin in the middle and appropriately thicker towards the edge. A click on the center image above will bring up a full sized plan in a new window. Keep the new window handy or, better still, print it out. You will probably want to refer to it frequently as I describe this system. If you are thinking of actually doing this I recommend a practice run on any piece of wood in a 4 x 4 x 1 proportion.
The first step is to cut the 12" x 12" x 3" block into four blocks 6" x 6" x 3".
Then, select two of these blocks and cut a 6"x 6" x 3/4" slab off the face of each. One of these will be your center piece (labeled A on the plan). Cut the other into four pieces 3" x 3" x 3/4" for the pieces labeled "F." Next, cut the two remaining 6" x 6" x 2 1/4" pieces into four pieces each to make eight pieces 3" x 3" x 2 1/4". Pick four of these eight to be the "C" blocks; cut the rest into pieces 3" x 3" x 1 1/8" (two from each) for the eight "E" blocks.
Now, cut the other two 6" x 6" x 3" blocks into 6" x 3" x 3" pieces. These will become the "B" and "D" pieces. Note that the cut to make the "B" and "D" pieces is angled. The "B" and "D" pieces should measure 6" x 3" and be 3/4" thick on one side and 2 1/4" thick on the other.
All that's left to do is glue them back together in their new orientation. Wait, what is that new orientation? Don't just glue them any old way, look at them and pick and choose which combinations will make a nicer finished piece. I will assume that you have read all of these instructions before you cut up the block in the the first place, and point out that you could, and should have, been picking and choosing all along.
The following series of images shows the whole glue-up for a bowl.
|
 |
 |
| Figure 1 | Figure 2 | Figure 3 |
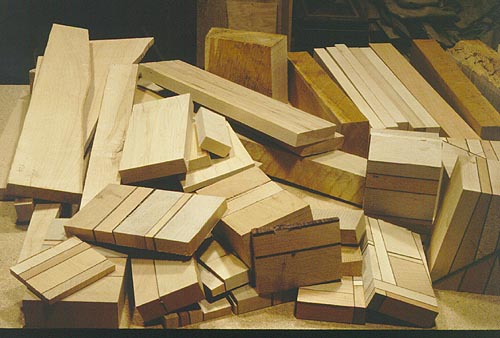
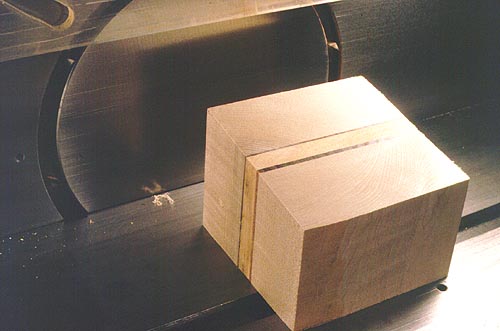
I start by rounding up some likely wood, in this case Maple and Cherry, with some Rosewood veneer to set off the joints. By piling it all up on the bench I get a sense of how much of each color of wood I will have in the end. I might add or subtract from this pile till I get the right amount of each color. In this case I'm also using some leftovers from a previous bowl. This process has a habit of continuing itself. Be careful not to include any cracked, checked otherwise ugly wood. You will be putting quite a bit of time into this process and selection mistakes now will haunt you to the end.
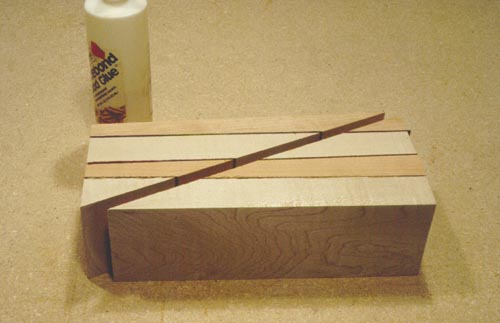
The first step is to glue up a stack of several pieces with veneer in the joints, then cut the stack in two. Figures 2 & 3 show one such stack and two of the many options available for reassembly.
 |
 |
 |
| Figure 4 | Figure 5 | Figure 6 |
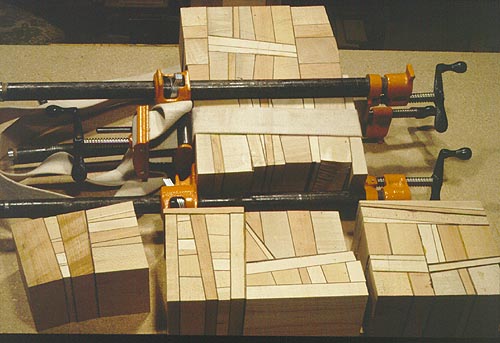
Figure 4 shows the re-glue option I picked and the clamps needed to hold it. Every joint needs to be surfaced. I use a Rockwell Uniplane (figure 5) to do this. As the work progresses you will be surfacing end grain, face grain, and side grain all at the same time. The Uniplane handles all of these beautifully. Sad but true, the machine hasn't been available since the 1970's. Keep thinking about the end result, what ratio of large pieces to small pieces do you want? This is all your choice, but the point is you do have a choice. Again, think about it. Figure 6 shows some progress, steering the blocks into shapes that will combine to the final square block.
 |
 |
| Figure 7 | Figure 8 |
 |
 |
| Figure 9 | Figure 10 |
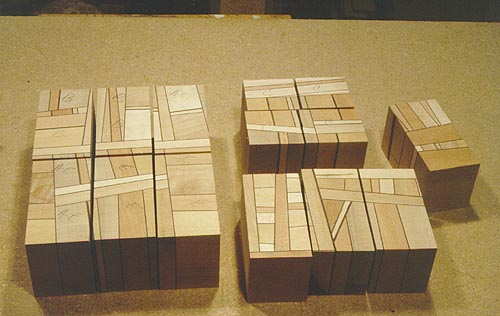
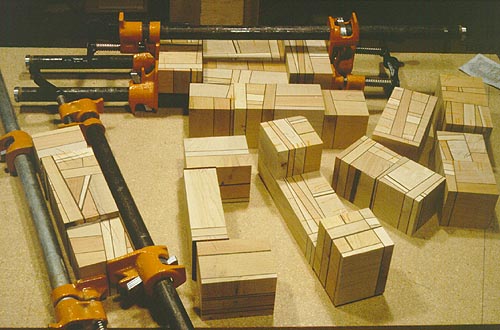
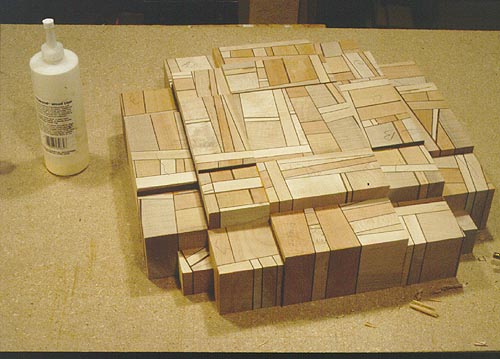
In figure 7 the initial block is almost done. The pieces being glued in the background will be half of the block and the pieces in the foreground will be the other half. Figure 8 shows the block after it has been cut into the "A, B, C, D, E, and F" pieces described above. The reassembly process has begun in figure 9 and is nearly complete in figure 10.
 |
 |
 |
| Figure 11 | Figure 12 | Figure 13 |
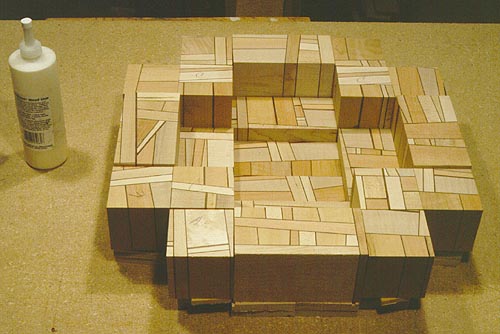
Figure 11 shows the completed block from the bottom of the piece; figure
12 from the top. In figure 13 the block has been bandsawn into round and
is ready for the lathe. The bottle of Titebond glue in the pictures is there
for a size reference. I don't recommend Titebond for this process. In time,
changes in humidity will cause Titebond joints to expand and the glue line
will rise. A better glue is the polyurethane Gorilla Glue, it won't expand
and won't dull your tools. The downside is that Gorilla Glue takes a long
time to set.
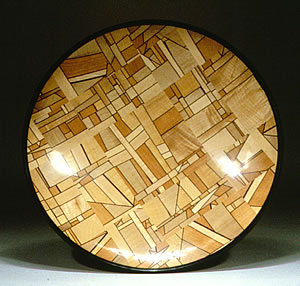 |
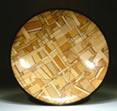
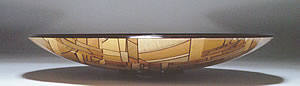
The finished piece, the perfect roundness and shape of the bowl contrast with the random pattern of the glued up block. But you and I know that the pattern was anything but random and (if you have tried this process yourself) the shape is about the only one available from the block. |
 |
Help
support this site |
Home * Send
E-Mail * Site Map * Wood
Turning * Alabaster
Turning * Guitars * Shona
Music * Marimbas * Bio
© 2000 Max Krimmel non-commericial
duplication and distribution expected and encouraged
Max Krimmel - 15 Sherwood Road - Nederland, CO 80466 - 303.258.7763