
Carving, Texturing and Painting Alabaster
When I first thought about combining carving with turning on my alabaster pieces I was worried. So much has been done in this area with wood that I was afraid of stepping on some one's toes, or looking like a derivative of someone else's work. After carefully looking at the work being done in wood I didn't see anything that looked quite like what I was thinking about. So, I decided to plunge in and start carving. The irony here is that what I ended up with wasn't much like the shape I originally had in mind. I realize now that I didn't have a very clear understanding of three dimensional shape to start with. Another great discovery was that alabaster is a superb carving medium, no real surprise here, that's what most of it is sold for. It just took me 18 years of working with it to make that discovery for myself. So, if you've been holding back, just get a few tools and start. Like it or not, you will most likely have an original piece in the end.
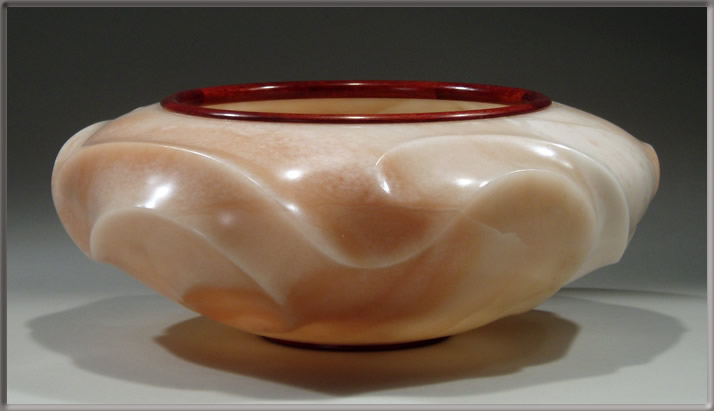
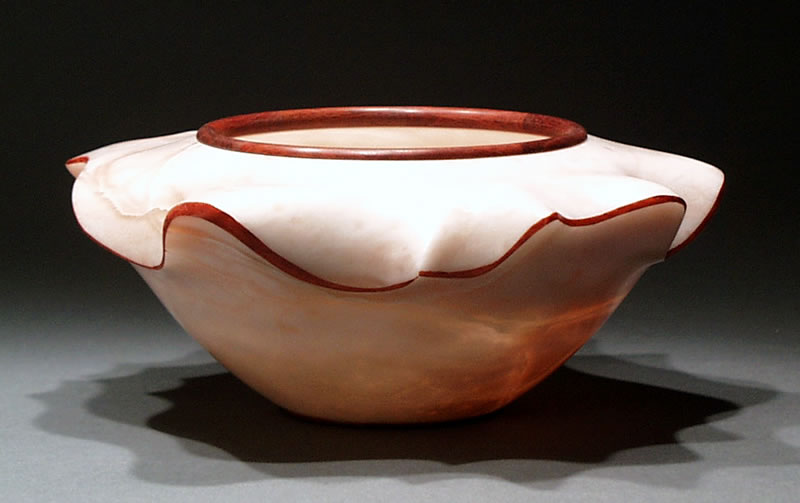 Vessel #649 |
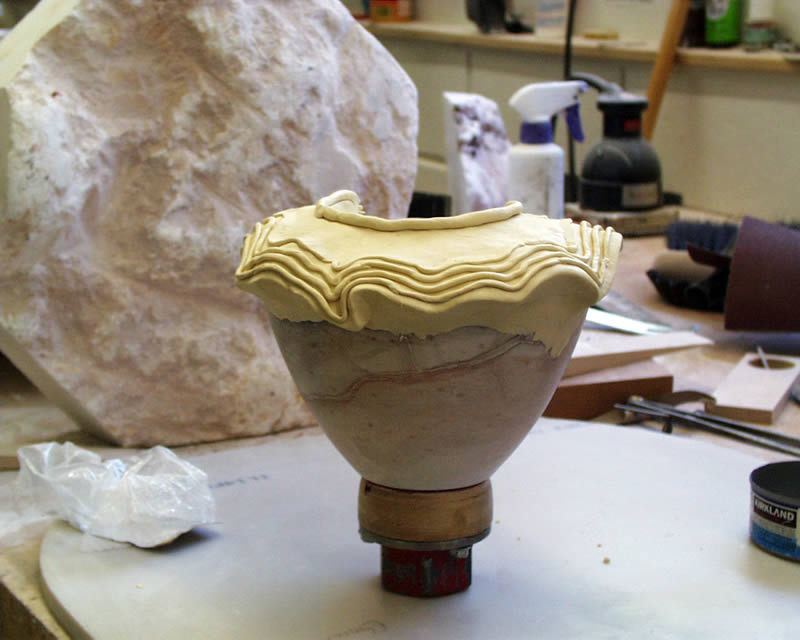 Modeling Clay |
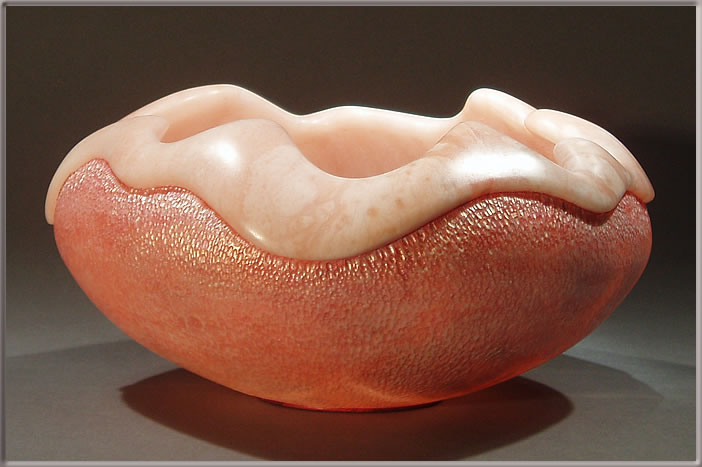
 Vessel #650 |
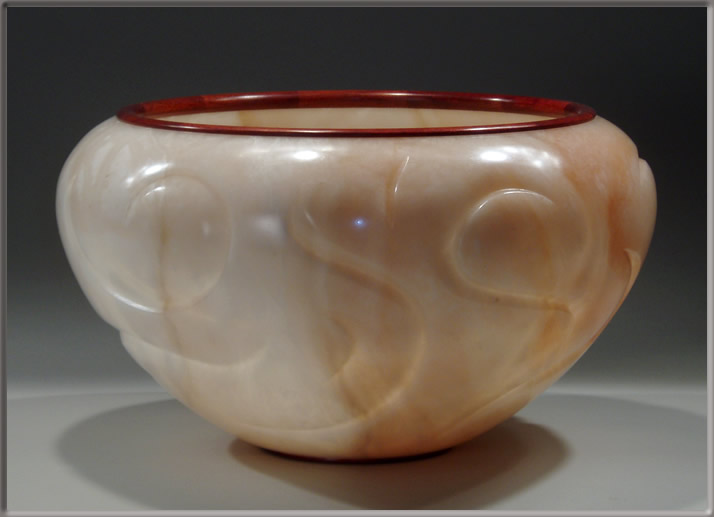
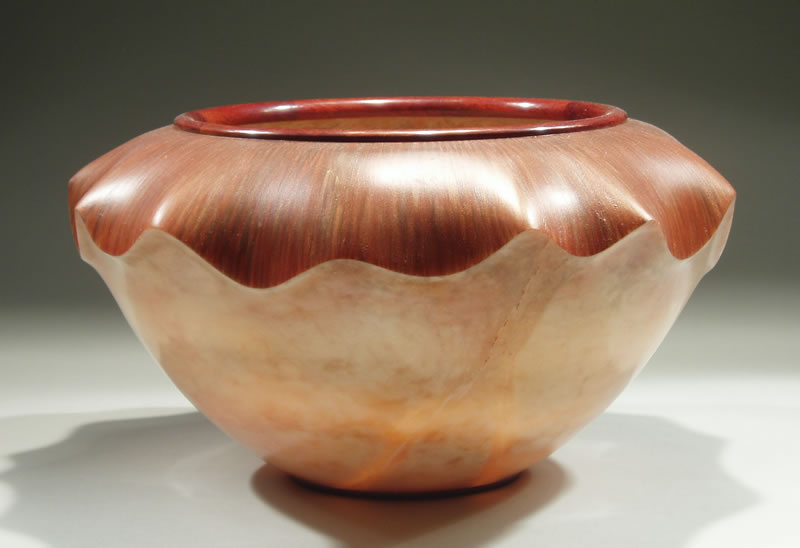 Vessel #655 |
 Vessel #658 |
 Vessel #670 |
 Vessel #671 |
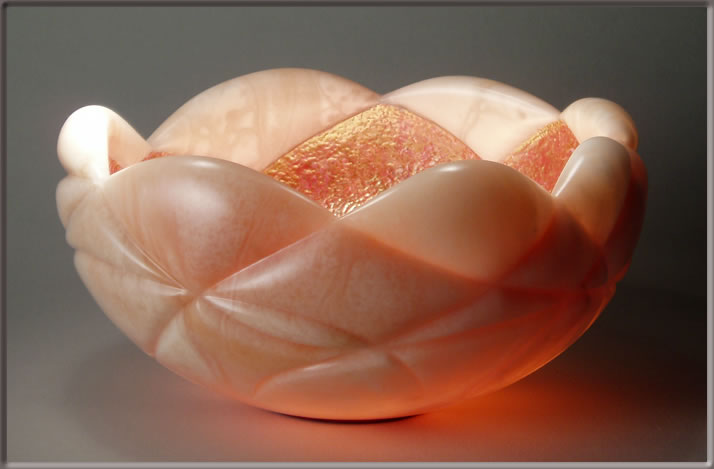 Vessel #676 |
Here's a quick history of my progress in carving. The first piece was Vessel #649 (the wavy band around the middle is paint, not wood). It was an acceptable but confusing start. Then I took another rough turned piece and used modeling clay to try to better understand and visualize my intended end result. The beading work on the clay turned out to be much more trouble than I had anticipated so I tried texturing the piece with a die grinder. The texture didn't show up much until I applied some paint (Interference Red, Vessel #650). With Vessel #655 I dropped the texture and emphasized the painting. I still have wood rims on these pieces, soon after I left the rim off and carved the piece all the way around to the inside (Vessel #658). I have certainly not abandoned the idea of wood rims on carved pieces. Vessels #670 and #671 have wood rims and either raised (#670) or incised (#671) lines. With Vessel #676 incised lines start at the base of the piece and become the edges of shapes at the rim. The interior of #676 is textured.
Tools & General Comments
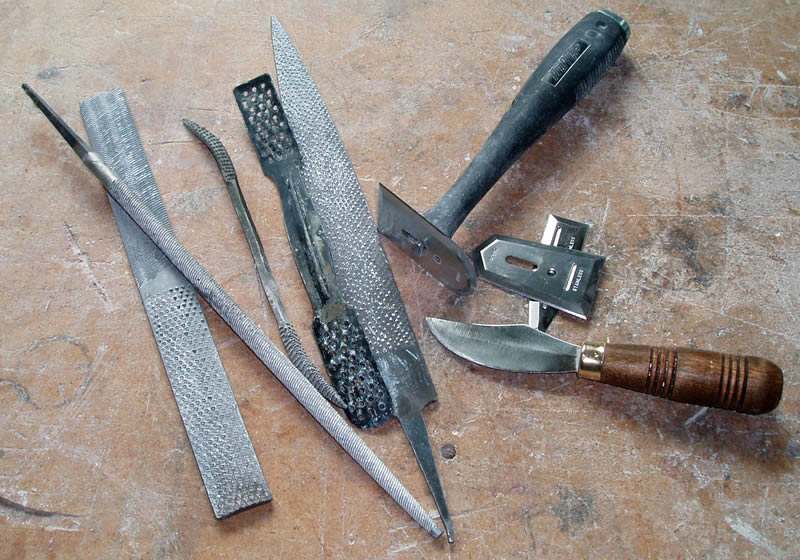 |
You won't need much to start carving. This is the collection of what I use most. Wood rasps work fine as do files and knives. The scraper at the top right is quite useful, it has interchangeable blades and is commonly available.
Step by Step Carving
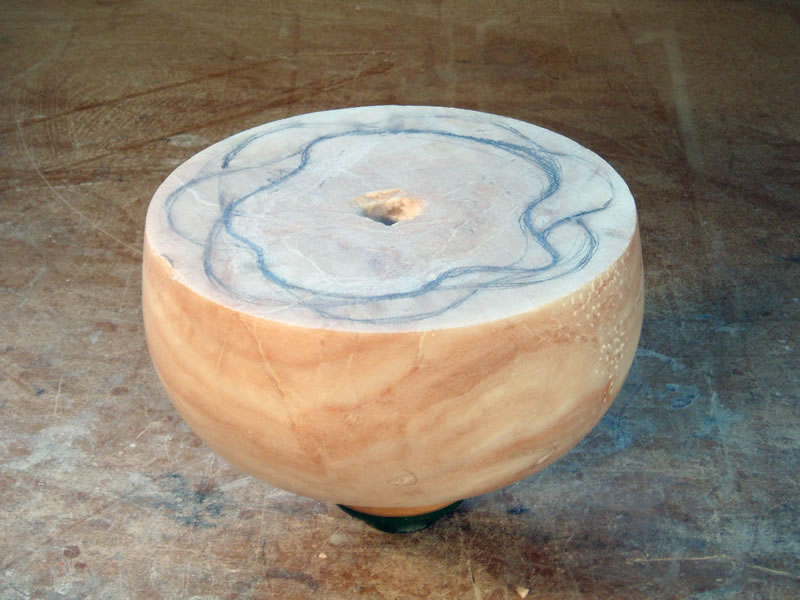 Fig. 1 |
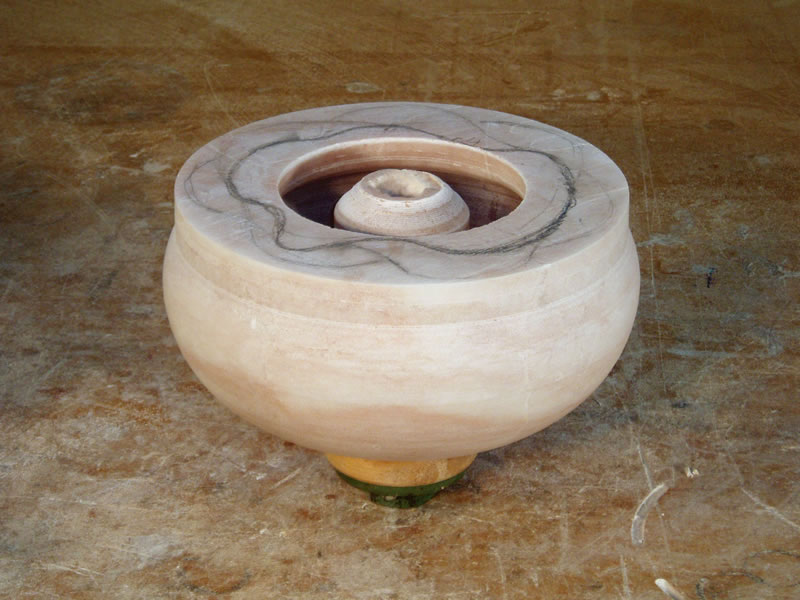 Fig. 2 |
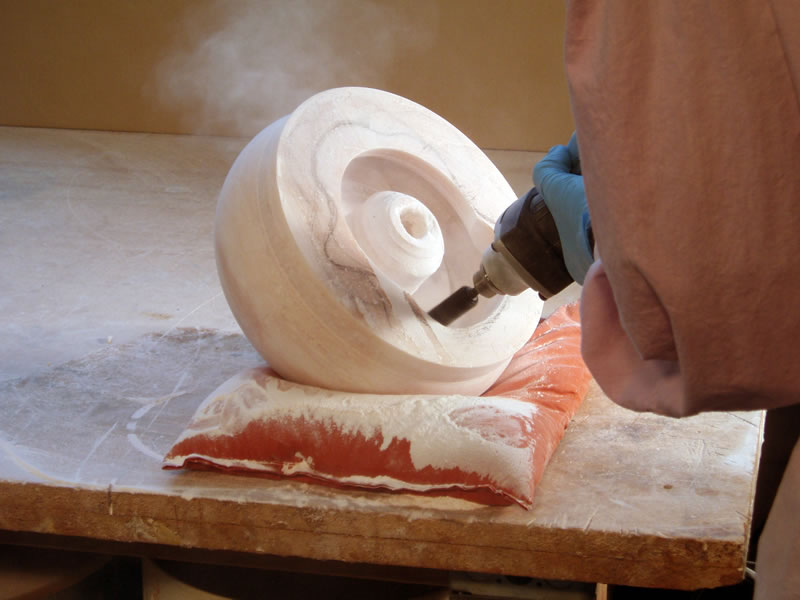 Fig. 3 |
 Fig. 4
 Figure 1 shows a rough turned block of alabaster on a faceplate, if you are not sure about getting to this point go to Part 1 of the basic turning tutorial. For this piece I am going to carve the rim and texture the outside. In figure 2, I have defined the area to be carved by hollowing out the center and delineating the carved, versus the turned, portion to the bowl. The pencil line on the top is an outline for the inner edge of the rim. The next step (figure 3) is to open up the rim by cutting to this line with an extra-coarse (black) Kutzall burr. Figure 4 shows this step completed.
 Fig. 5 |
 Fig. 6 |
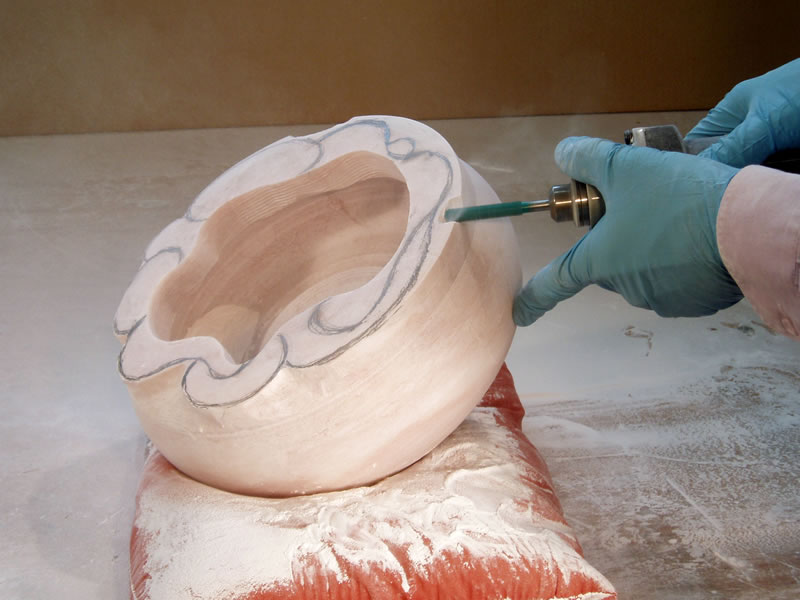 Fig. 7 |
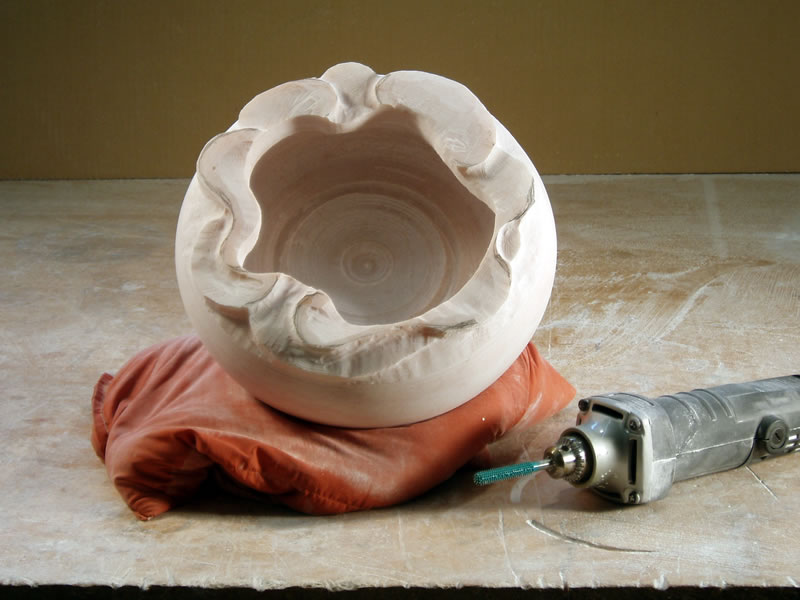 Fig.
8 Fig.
8 |
After roughing out the rim opening I've removed the core and done more hollowing (figure 5). Next, a minor change of plan, I wasn't liking the shapes I had initially sketched out on the rim. So, I scraped off that pattern and redrew them (figure 6). In figure 7 I'm using the Woodhog die grinder with a coarse (teal) Kutzall cutter to cut down the areas between the rim shapes. In figure 8 I've defined the layering of the rim shapes.
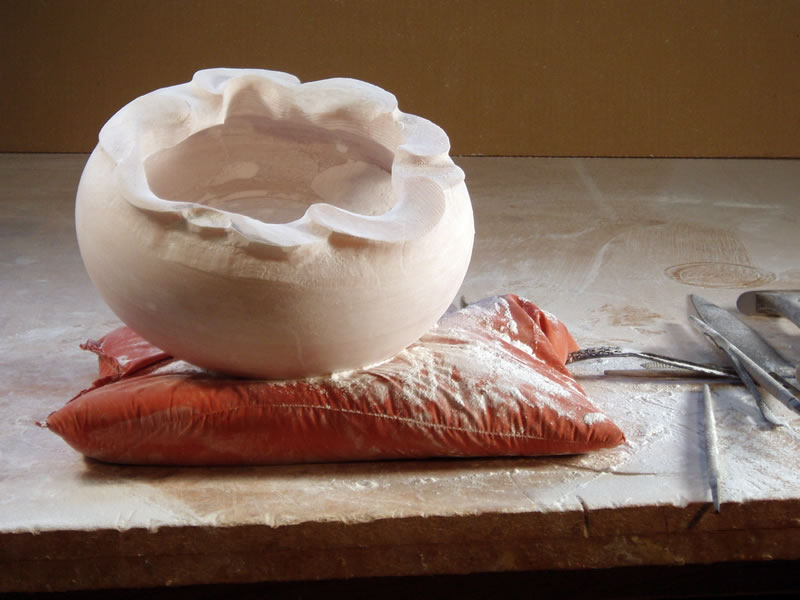 Fig.10 |
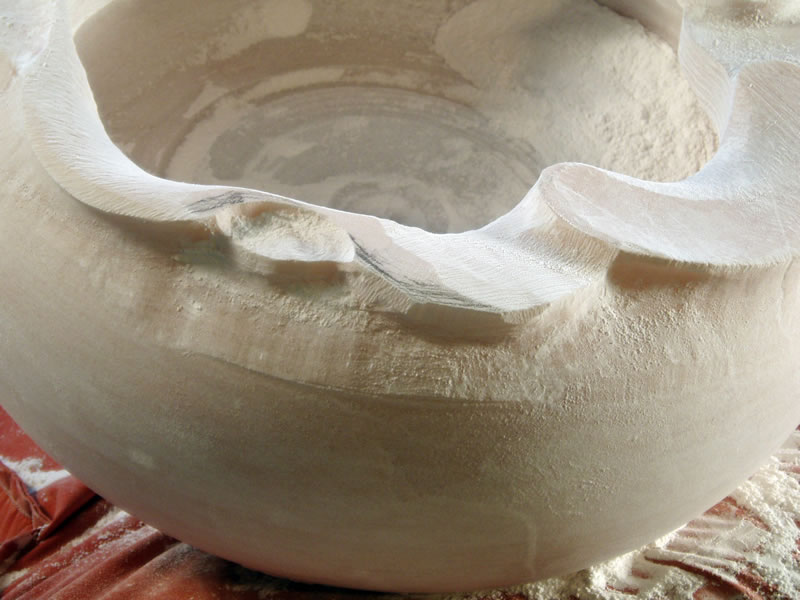 Fig. 11 |
 Fig.
9
Fig.
9Figure 9 is a side view of the piece at this point, I now have the rim rough carved. Now the techniques change. In figures 10 and 11, I have changed to using scrapers to merge the caved area with the turned area.
 Fig.
12 Fig.
12 |
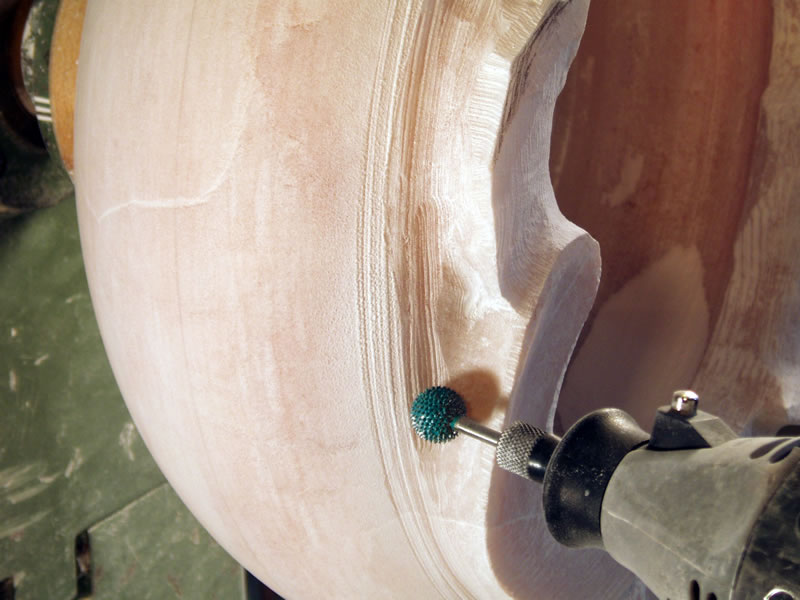 Fig.
13 Fig.
13 |
 Fig.
14 Fig.
14 |
For this piece it is important to smoothly blend the carved parts and the turned parts. This involves making the voids between the carved shapes as round as the turned areas. I have made a simple holder, figure 12, for the die grinder (in this image a Dremel tool) which allows me to move the cutter into position, rotate the lathe by hand as far as I can without cutting into the carving, then swing the grinder out of the way. By repeating this process all the way around I can work the roundness of turning into the carved areas. Figure 13 is a close up of the process. Figure 14 is the lathe handwheel, the knob on the disk will spin freely and allows me to turn the lathe smoothly without changing my grip. I use this procedure and scrapers (figure 11) alternately until I can't tell where the turning stops and the carving starts.
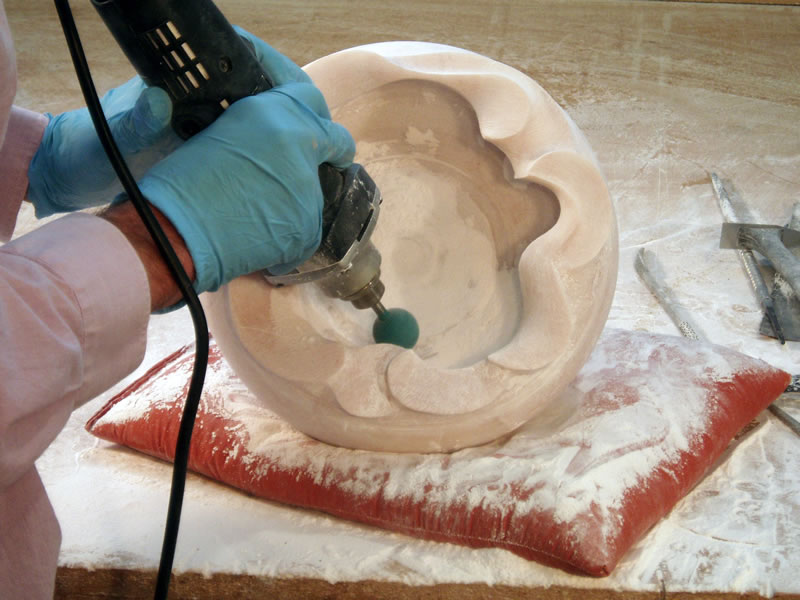 Fig. 15 |
 Fig. 16 |
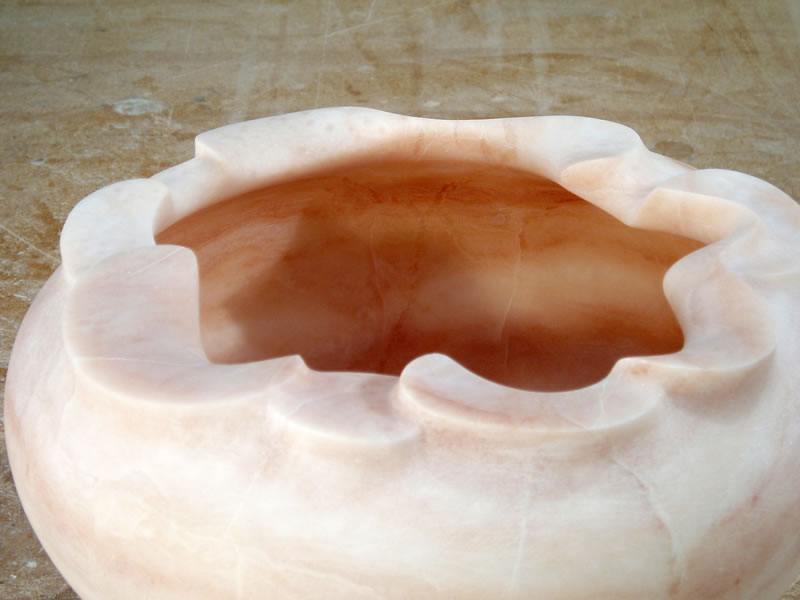 Fig. 17 |
Shaping the underside of the rim adds considerably to the effect of the carving. I use a large (1") Kutzall, figure 15, as well as scrapers and the turning technique described above. Again, the idea is an imperceptible transition from carved to turned areas. It's time now to finish any turning and sanding to be done on the lathe. This includes, final shaping of the outside, final thicknessing of the walls, finish sanding the inside, and sanding the outside with 120 grit abrasives (figure 17).
Vacuum Chucking to Finish the Base Fig. 18 |
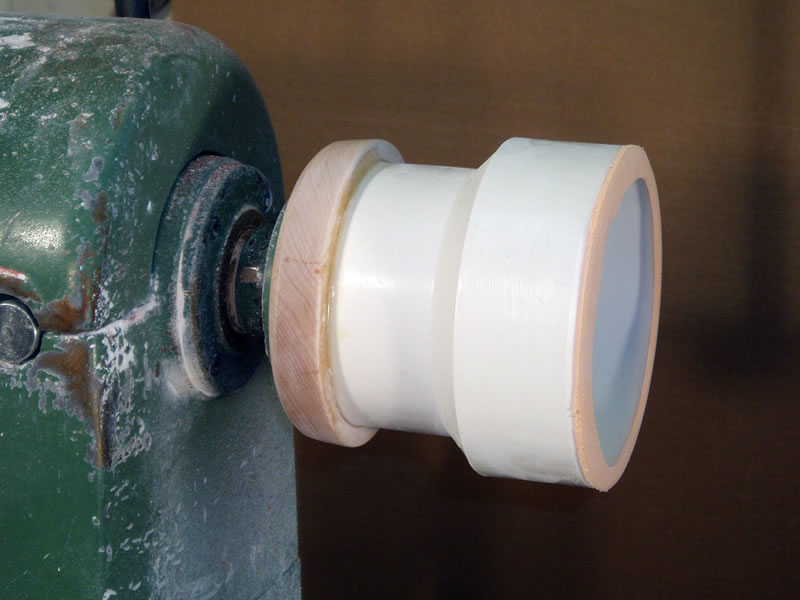 Fig. 19 |
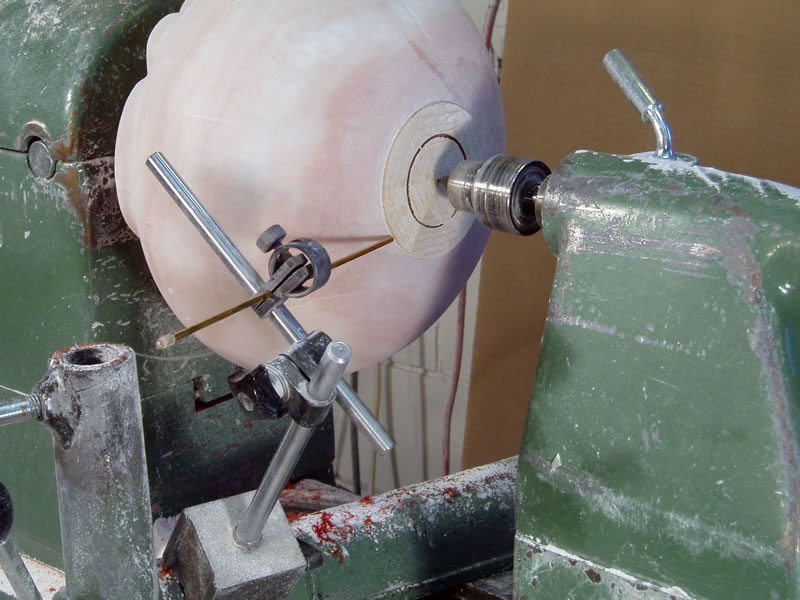 Fig. 20 |
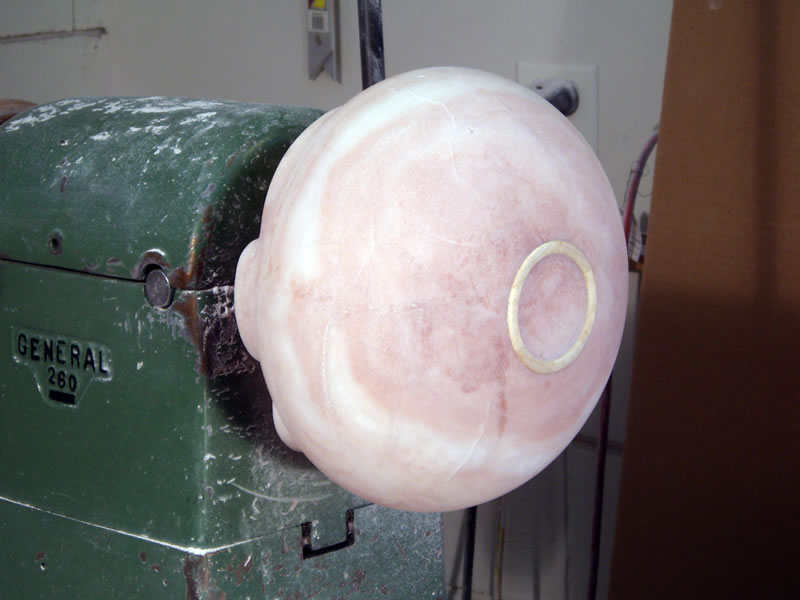 Fig. 21 |
The mounting system all along has been a combination of a faceplate, two wood disks, stuck together with double faced tape, one of which is glued to the stone and becomes the base of the finished work. For more information on this system see Basic Alabaster turning Part II. It's now time to separate the tape joint (figure 18). I pry the joint apart with a screwdriver (left hand) and work a thin bladed artists pallet knife into the joint with the right hand. Slow and steady does it, the joint won't come apart all at once like a CA joint will, you have plenty of time to pull the last bit of tape away. The piece is then vacuum chucked from the rim side. If the bowl has a wood rim I can use the flat disk vacuum chuck described in Part III of the basic tutorial. In this case that won't work, since the rim isn't flat. An internal vacuum chuck is necessary (figure 19). This one is made from a PVC fitting. Internal chucks are a bit more trouble to center but the technique is the same as a flat disk chuck, check it, tweak it, check it again until it is as good as you have patience for. Figure 20 shows the magnetic based probe it use to check the centering. In figre 21 the base disk has been turned into a ring and the piece is now ready for texturing. I leave the faceplate taped to the piece as long as I can. On a design with the interior textured and the outside smooth I would get my finish topcoats on before I did this removal procedure.
Texturing
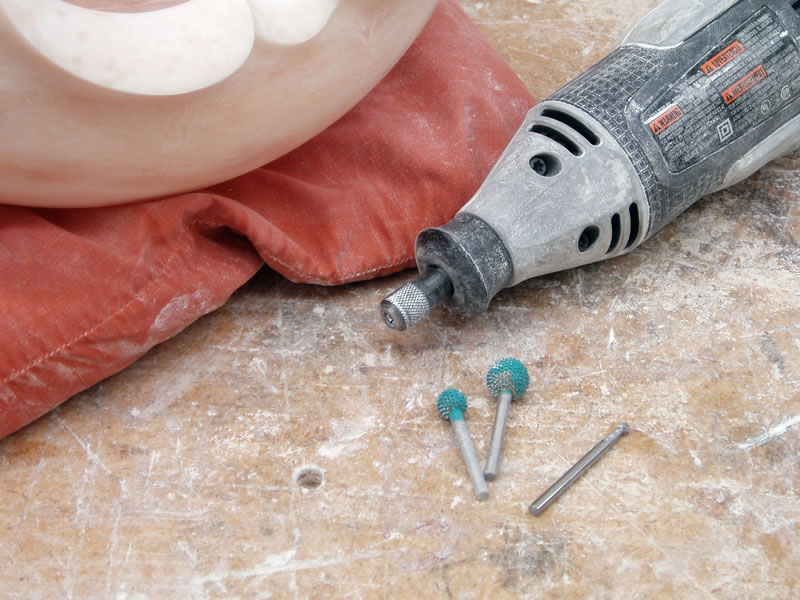 Fig. 22 |
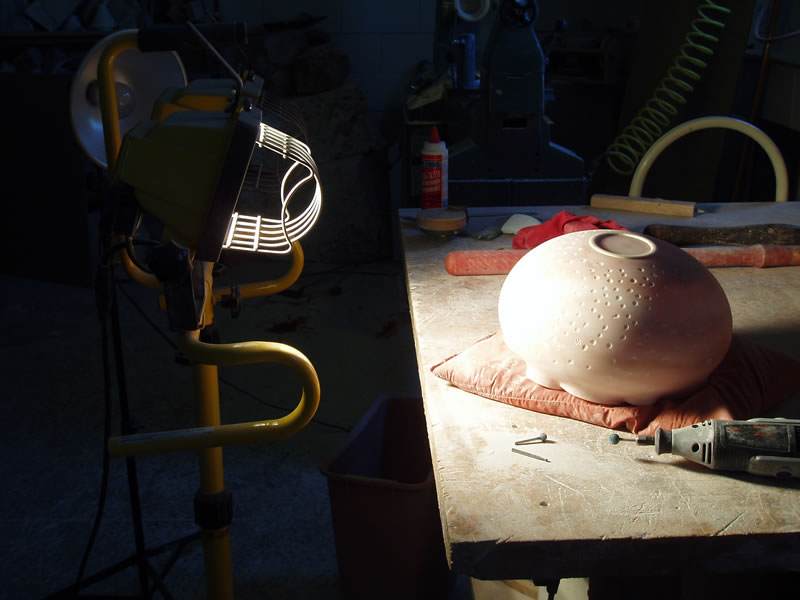 Fig. 23 |
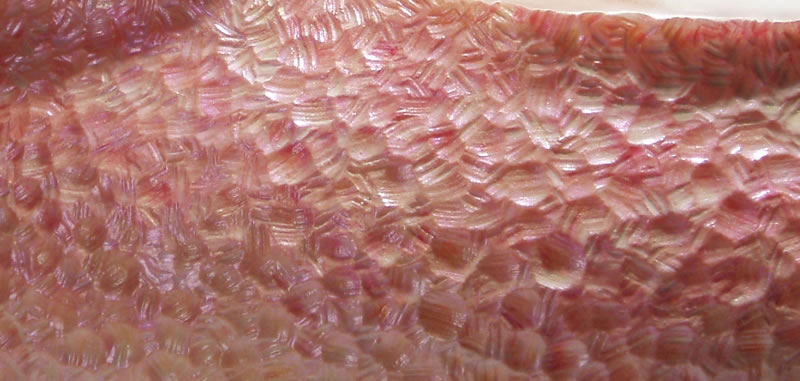 Fig. 24 |
The texture on this piece was done with the three burrs (two Kutzall and one carbide) pictured in figure 22. The small burr was used right at the base where the Kutzalls would be too large to get close to the base. There are two common problems with doing texture. One is missing a spot here or there and the other is controlling the directional nature of cuts. A strong cross light helps with the problem of missing small areas figure 23. Another tip is to start by overpainting the area to be textured with ultraviolet dye (Rit fabric Whitener/Brightener). I use both of these techniques. First I mix up some dye, the portions aren't critical, and brush it over the area to be textured. Then I use the cross light and do the texturing. When I think I've got everything textured I shine a black (UV) light on the piece and all the spots I missed show up clearly. Sometimes I just skip the cross light and work directly under the Ultraviolet. Look closely at the texture detail image (figure 24) the Kutzall burr makes the small parallel grooves in each cut. It's easy to find a comfortable position to hold the grinder and start texturing away. If you do, all of those grooves will have approximately the same orientation. Then when you shift positions the new section will contrast with the previously section of texture. If you want a random appearance it's important to shift your position often and build the texture uniformly over the whole piece rather than working one area to completion then starting somewhere else. In the cross light image you can see that I've worked around the entire piece with widely spaced burr hits. I'll keep going around and around until the texture coverage is nearly complete. At some point I go for complete coverage but try to keep shifting the grinder position. Another approach is to aim for an organized texture, in which case you need to pay attention to the orientation of the grinder to the work.
Painting
Paint is comprised of three things: pigment, binder and vehicle. The pigment is the color, the binder is what holds the pigment to the painted surface and the vehicle is what dries out of the binder leaving it hard. Looked at this way there are all sorts of things you could paint with. I'm using three combinations of pigment, binder and vehicle: 1, Acrylic, the tube has the binder (acrylic medium) and the pigment mixed into it. 2, Bartley's Gel Varnish with pigment mixed into it, and 3, Egg Tempera, the medium is egg yolk. Each has it's advantages. Acrylic is easy, quick drying and available, but the paint looks gloppy on the surface, if you want the paint to lie flat, like watercolor or ink, this is not the way to go. Bartley's Gel Varnish is very flat on the surface but is hard to control where it goes, it's also a slow drier. Egg tempera lies pretty flat on the surface but can't be handled and doesn't dry quite as quickly as acrylic. So for textured areas I use acrylic, it doesn't matter that the paint has body. For smooth areas I want to cover completely the Bartley's combination is the ticket. Egg tempera is the choice for smooth areas that need precise control. You will need to top coat anything done in egg tempera with Bartley's or some other clear coat.
In this example I'm painting with glazes of color. A glaze is a paint coat with a lot of medium mixed in. It is not intended to cover completely, but rather to push the color one way or another. On this piece I used eight applications of paint to arrive at the final result. Here's a series of images and list of the painting done at each step.
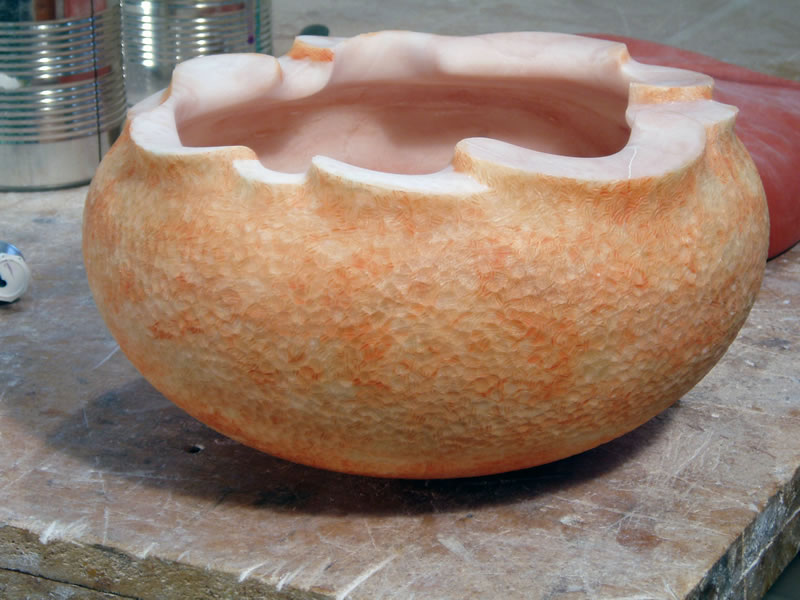 Fig. 1 |
 Fig. 2 |
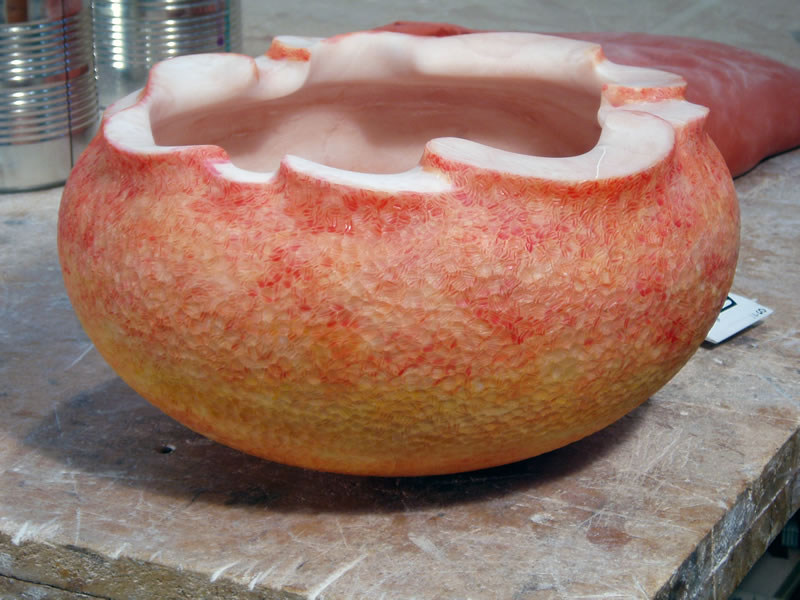 Fig. 3 |
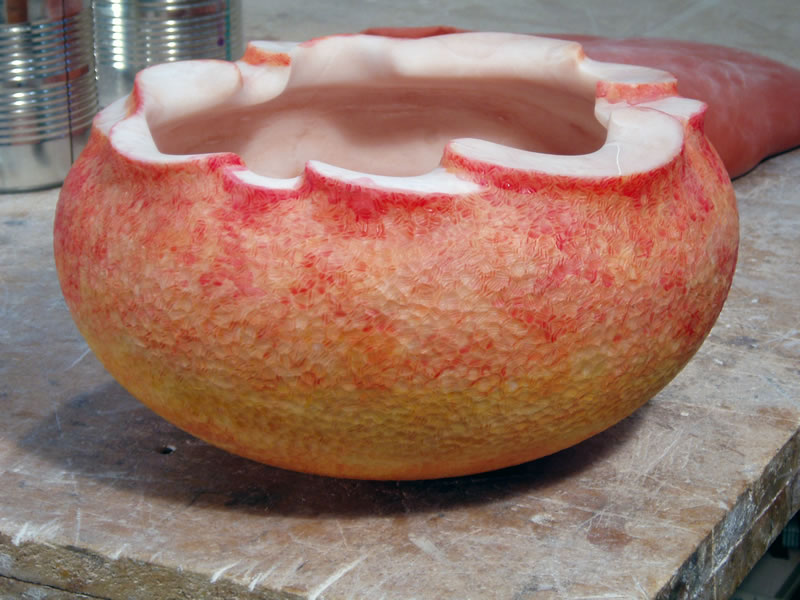 Fig.4 |
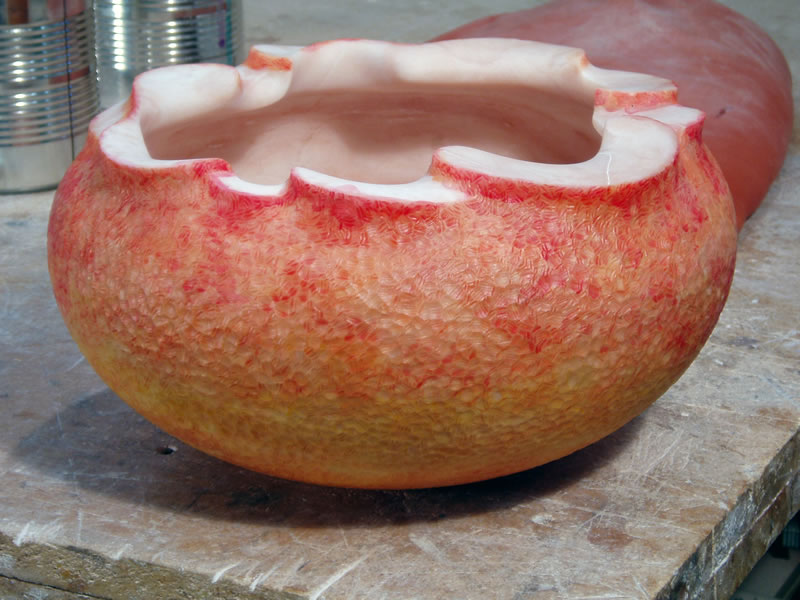 Fig. 5 |
 Fig. 6 |
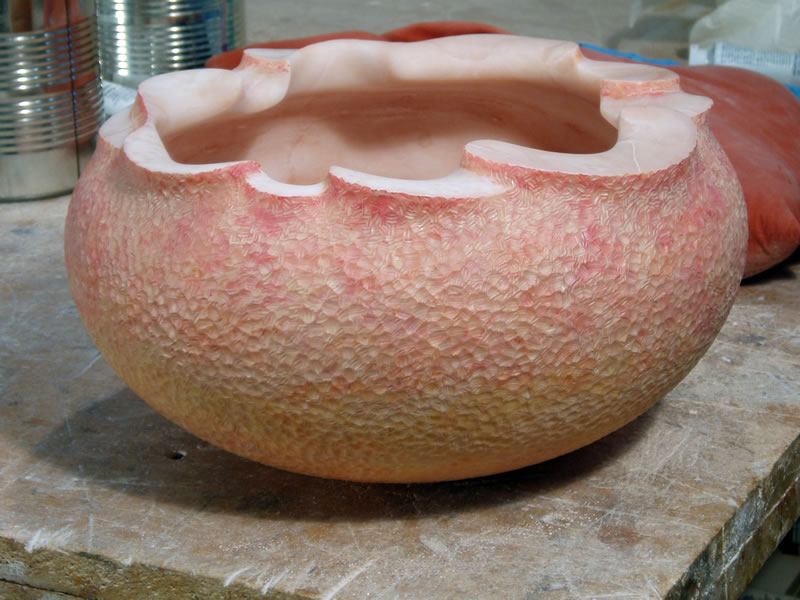 Fig. 7 |
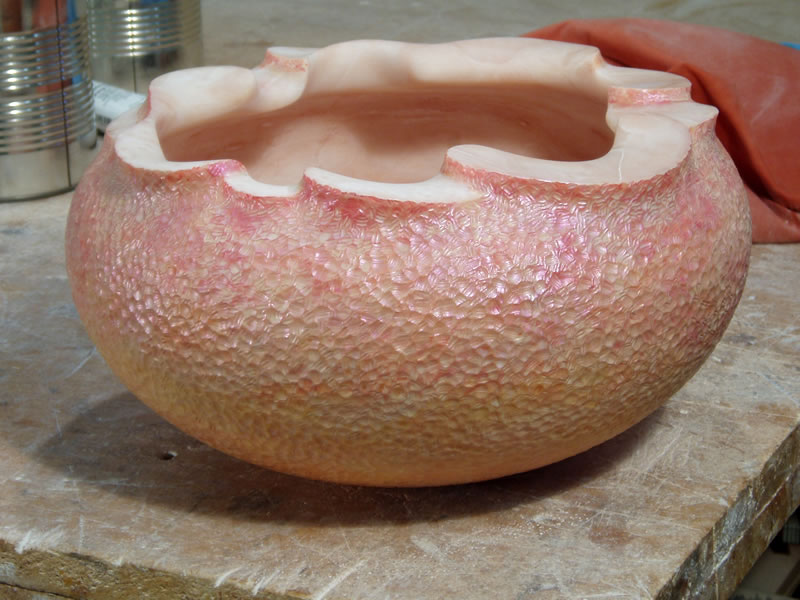 Fig. 8 |
-
Fig. 1 - Titanium White with Quinarcadone Burnt Orange and Phthalo Green
-
Fig. 2 - Yellow Oxide on the bottom, Alizarin Crimson on the top
-
Fig.3 - Organic Vermillion on top
-
Fig. 4 - Pyrrole Red on top
-
Fig. 5 - Potters PInk all
-
Fig. 6 - Interference Gold all, Interference Copper on the base
-
Fig. 7 - Titanium White with Yellow Oxide and Quinarcadone Burnt Orange
-
Fig. 8 - Interference Lilac all
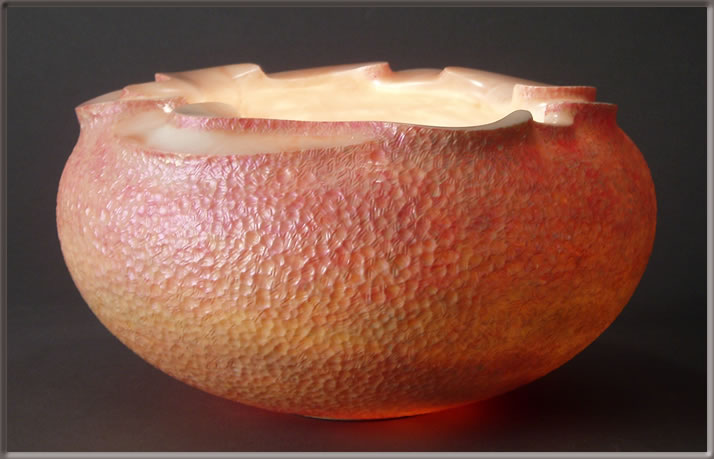 |
The finished piece - Vessel #673
Help
support this site |
Home * Send
E-Mail * Site Map * Wood
Turning * Alabaster
Turning * Guitars * Shona
Music * Marimbas * Bio
© 2000 Max Krimmel non-commericial
duplication and distribution expected and encouraged
Max Krimmel - 4875 Sioux Dr. apt. 008 - Boulder, CO 80303 - 303-715-8275